# Custom Tool Integration Guide via hooks
In this guide, we will see, how you may integrate any custom application with vREST NG using hooks functionality. We will take the example of JIRA integration.
Use Case: We would like to log individual issues for each test failure in prod environment while doing the build validation. And the issue should contain the following information:
- Test case summary
- Test case iteration summary in case of data-driven testing
- API endpoint
- Assertions summary report
- Diff report
Now, let's see, how we can obtain our objective using the functionality of the hooks.
# 1. Understand the Third Party Tool API
First, understand the REST API structure of the tool which we are going to integrate with vREST NG. In our case, we can look at JIRA REST API to create an issue (opens new window).
# 2. Setting up variables
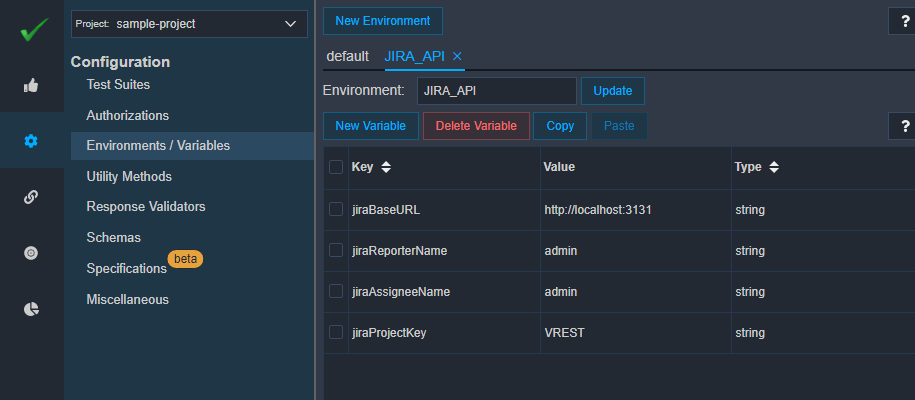
For our JIRA hook, we need to configure the following variables.
jiraBaseURL- Base URL of JIRA Application where JIRA Application is hosted.jiraReporterName- Reporter user name on behalf of issue will be logged.jiraAssigneeName- Assignee user name to which the logged issue will be assigned.jiraProjectKey- Project key in which the issue will be logged.
We can configure the above variables in Configuration Tab >> Environments / Variables. For more information on this, please read our guide on Environments / Variables. We will use these variables while configuring the hook request.
# 3. Setting up the authorization
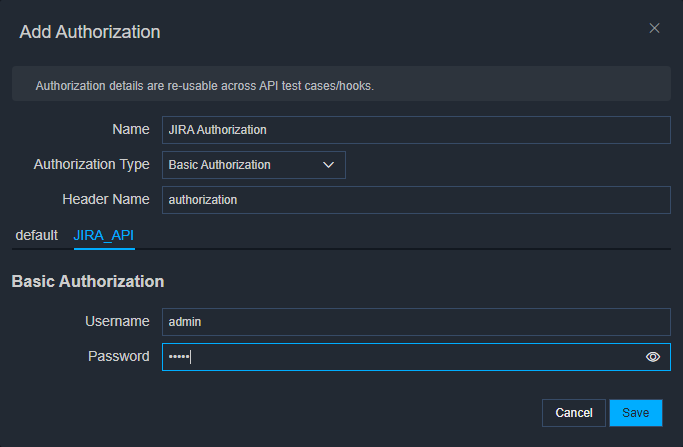
Now, triggering the JIRA API request needs authorization. For that, we can configure authorization in vREST NG. Let's configure the basic authorization in Configuration Tab >> Authorizations section. Provide here the username and password for your JIRA Application like this.
# 4. Select the desired hook type
As per our use case, we would like to log issues on each test case failure during our validation cycle. So for our case, Post Test Case Iteration hook (post-test-case-iteration-hook) will be needed. In the next step, we will configure the Post Test Case Iteration Hook.
# 5. Configure the hook request
To configure the hook request, follow the steps below:
Add a new hook request
To add a new hook request,
first open the Hooks tab and then click on
plus(+) button to add a new hook as shown in the following screenshot.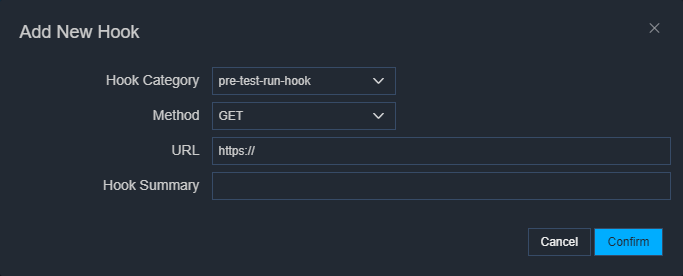
Then in the dialog window, select the desired hook category and provide the necessary API endpoint details and meaningful summary for our hook and then click on Confirm button to create the hook.
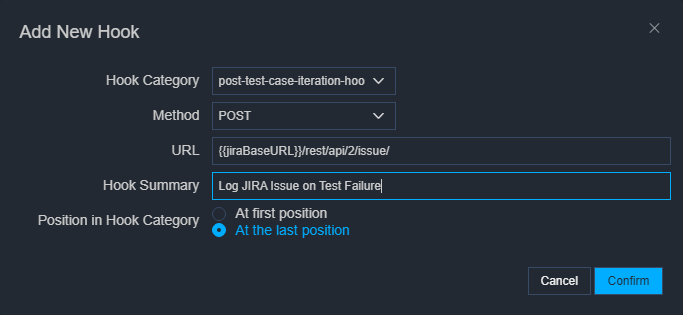
The hook has been created and will be automatically opened.
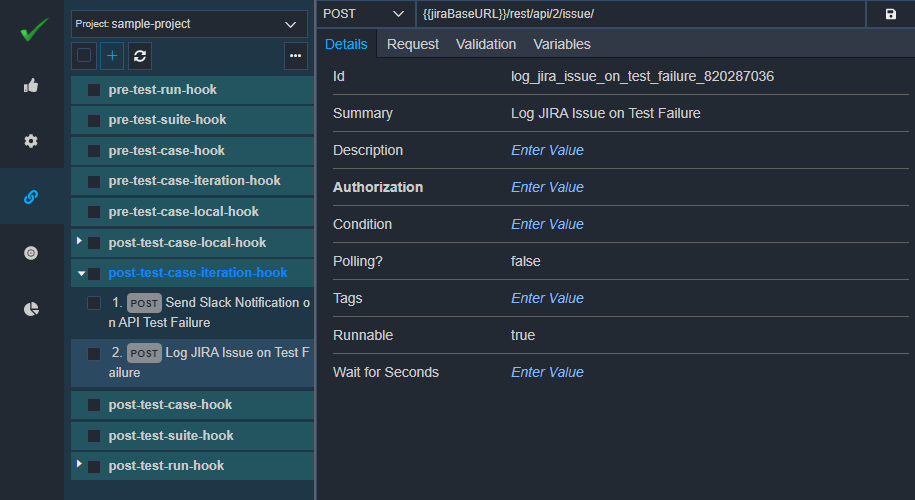
Specify hook condition
Now specify the hook condition, when we want to execute this hook. In our use case, we would like to execute this hook whenever our test case fails and for the prod environment. So we can specify the following condition:
!{{$tc.result.isPassed}} && '{{$tr.details.environment}}' === 'prod'For more information on the
$tcand$tr, you may look at our guide on hook types.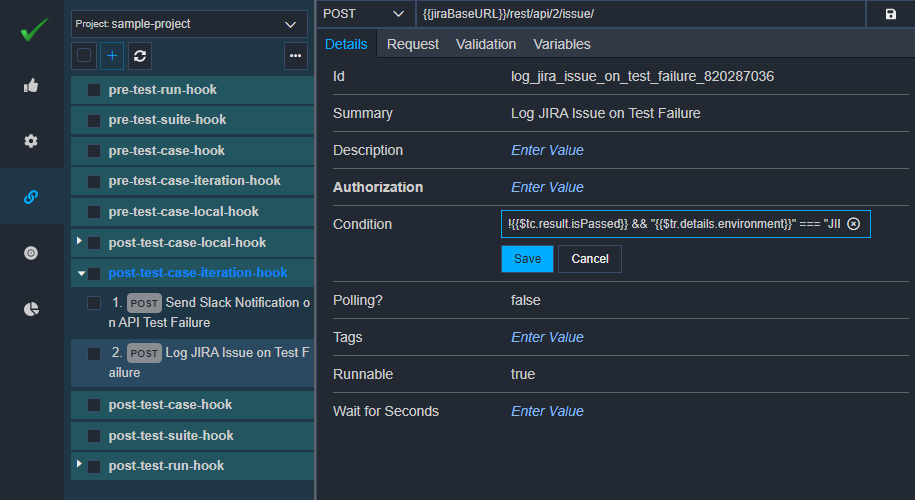
Specify the authorization for hook
We have already configured the JIRA Authorization. Let's link that authorization to our newly created hook by specifying the
Authorizationfield in theDetailssub-tab of the hook request.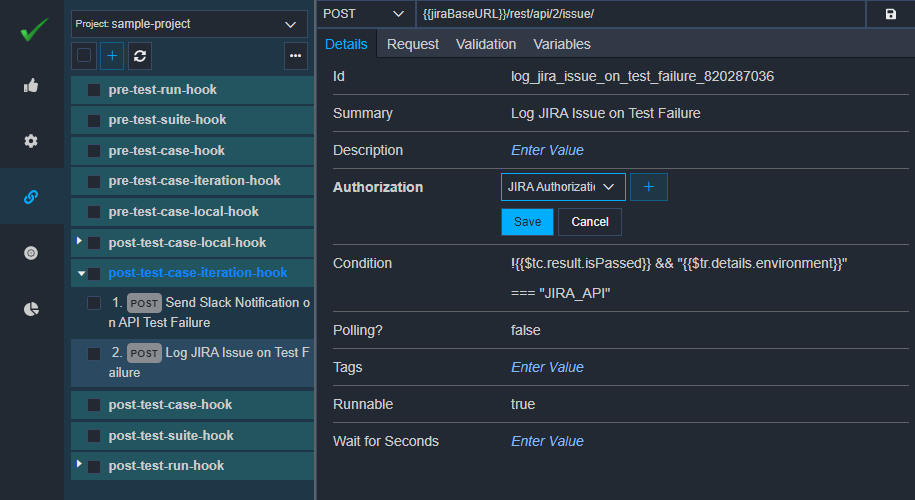
Specify Request Body for the hook
Now, we will configure the request body for the hook. We can look at the API specification provided by the tool vendor to configure this request body. In the case of JIRA, we can specify the following request body:
{
  "fields": {
    "project": {
      "key": "{{jiraProjectKey}}"
    },
    "issuetype": {
      "name": "Bug"
    },
    "summary": "Test Case Failed - {{$tc.details.summary}}",
    "reporter": {
      "name": "{{jiraReporterName}}"
    },
    "description": "--- *Test Case Failure Notification* --- \n*Test Run Name:* {{$tr.details.name}} \n*API Endpoint:* {{$tc.request.url}} \n*Summary:* {{$tc.details.summary}} \n*Iteration Summary:* {{$tc.details.iterationSummary}} \n*Assertion Summary:*\n{{$tc.result.assertionSummary}}",
    "assignee": {
      "name": "{{jiraAssigneeName}}"
    }
  }
}
The above request body, you may specify as shown in the below snapshot:
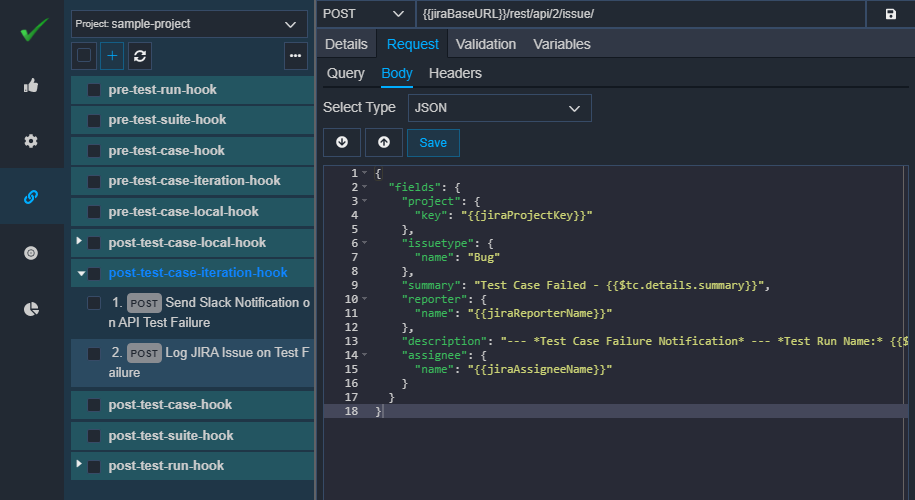
That's it, Now, our hook has been configured. It will log issues automatically for each test case failure in the prod environment as shown in the below snapshot:
# 6. Testing our configured hook
Now, let's execute a sample test case in the Test Cases tab which fails in the prod environment to check the hook execution. You may see the test case specific hook execution details in the Hooks tab in the rightmost pane as shown below:
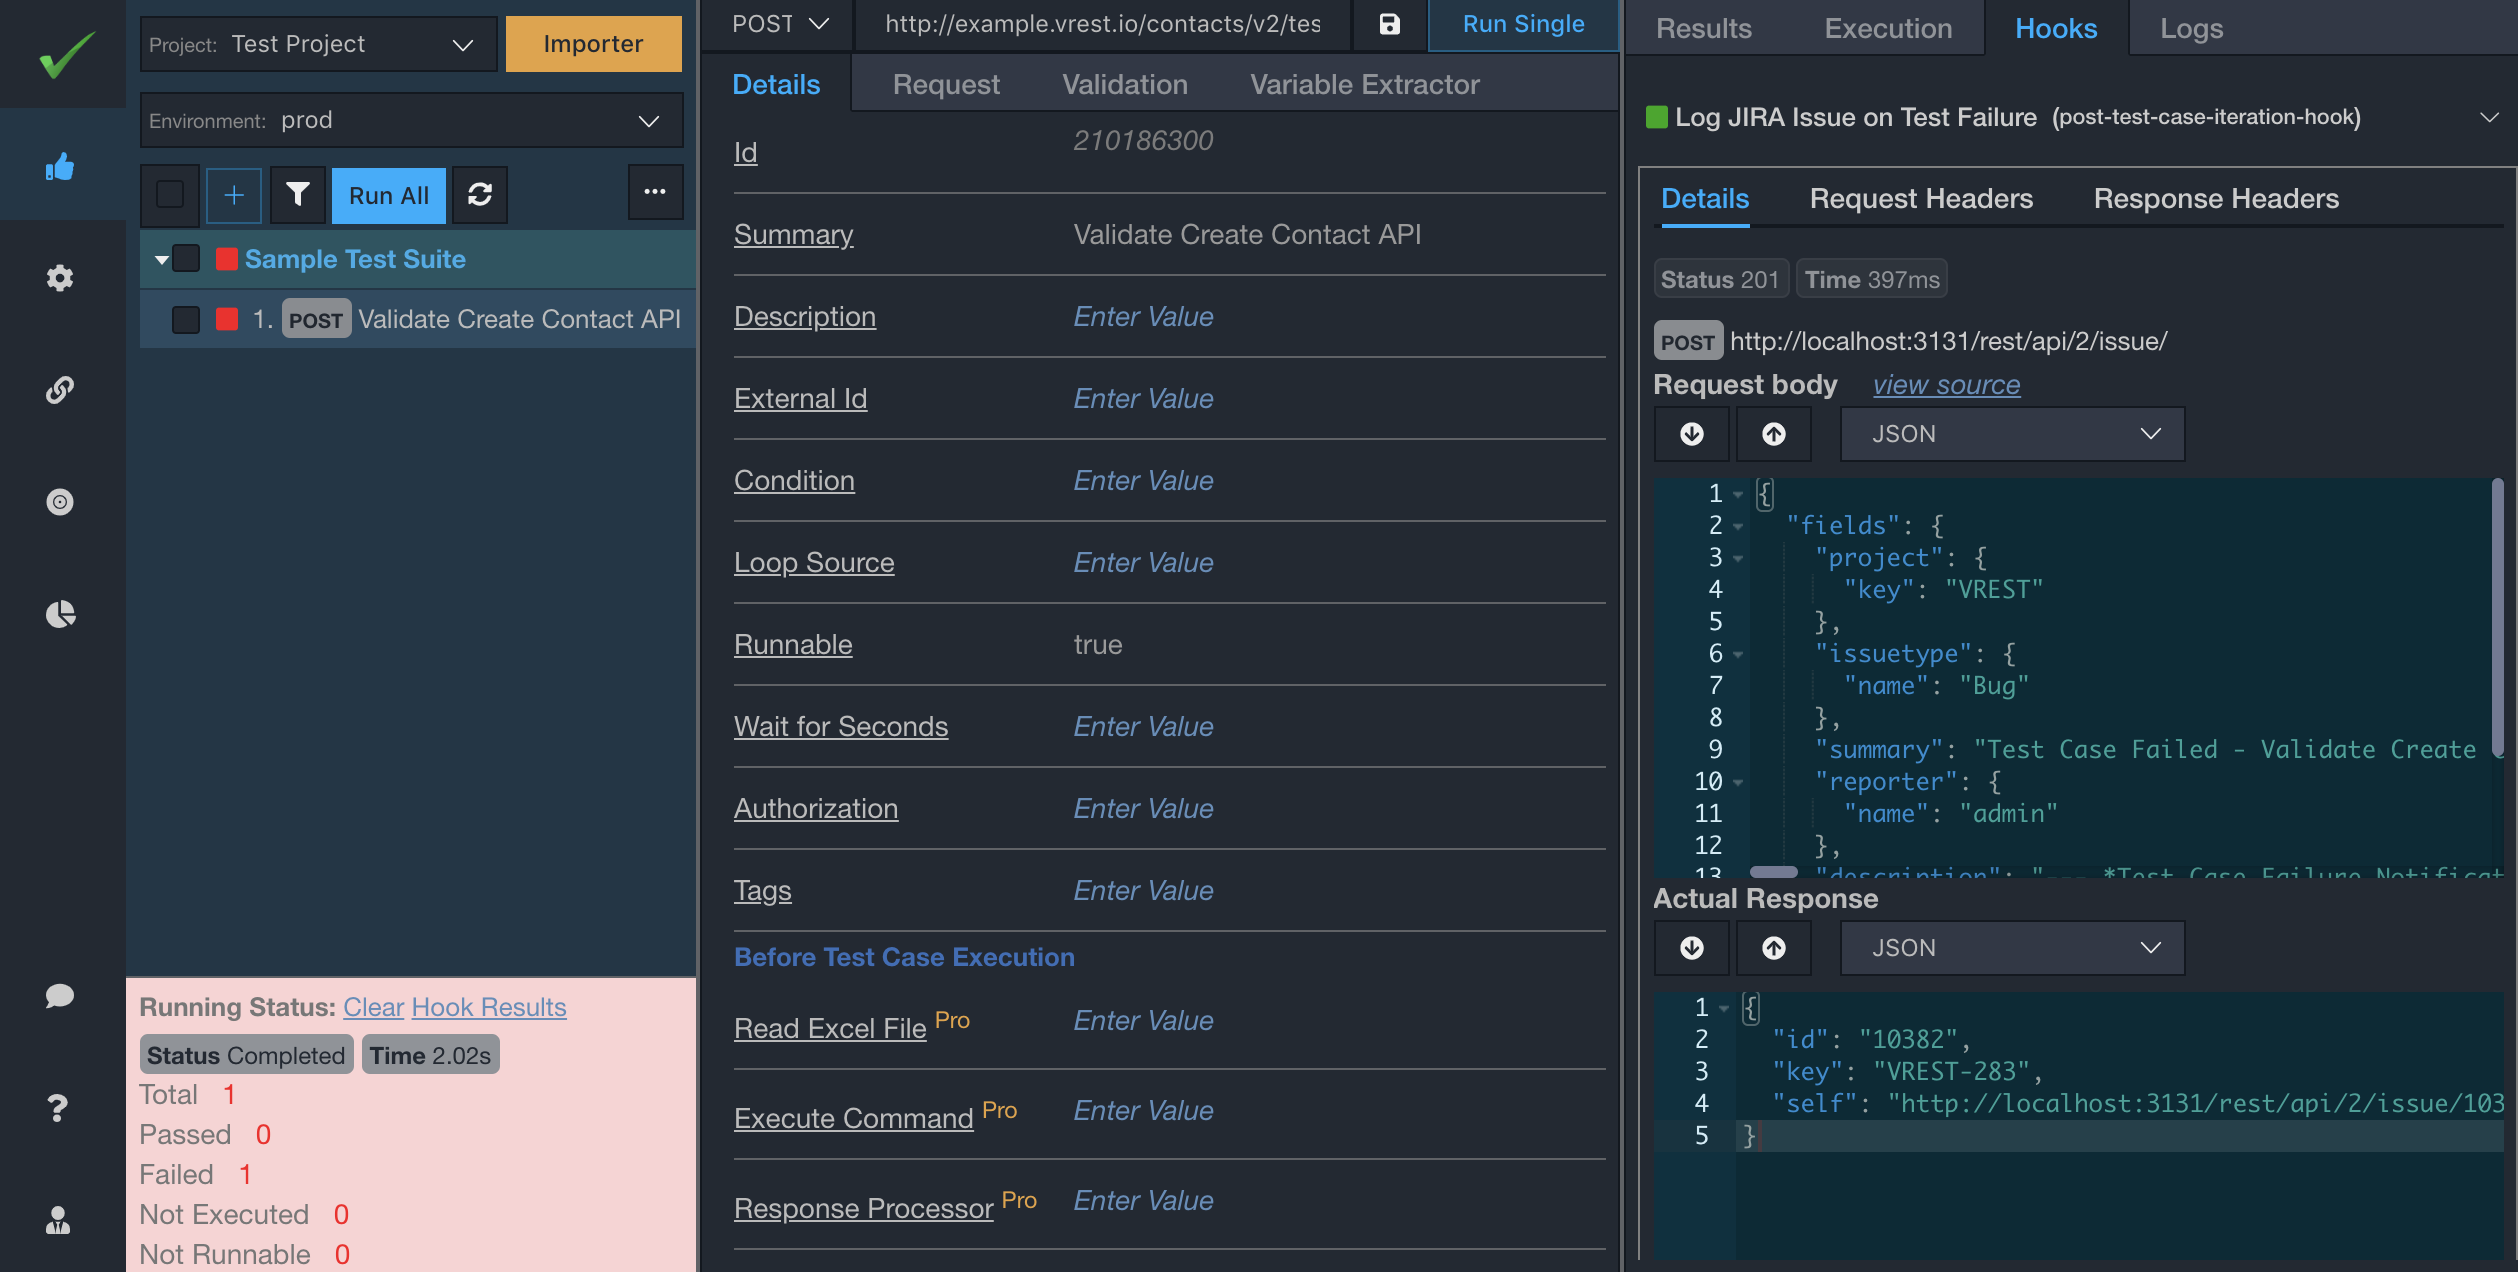
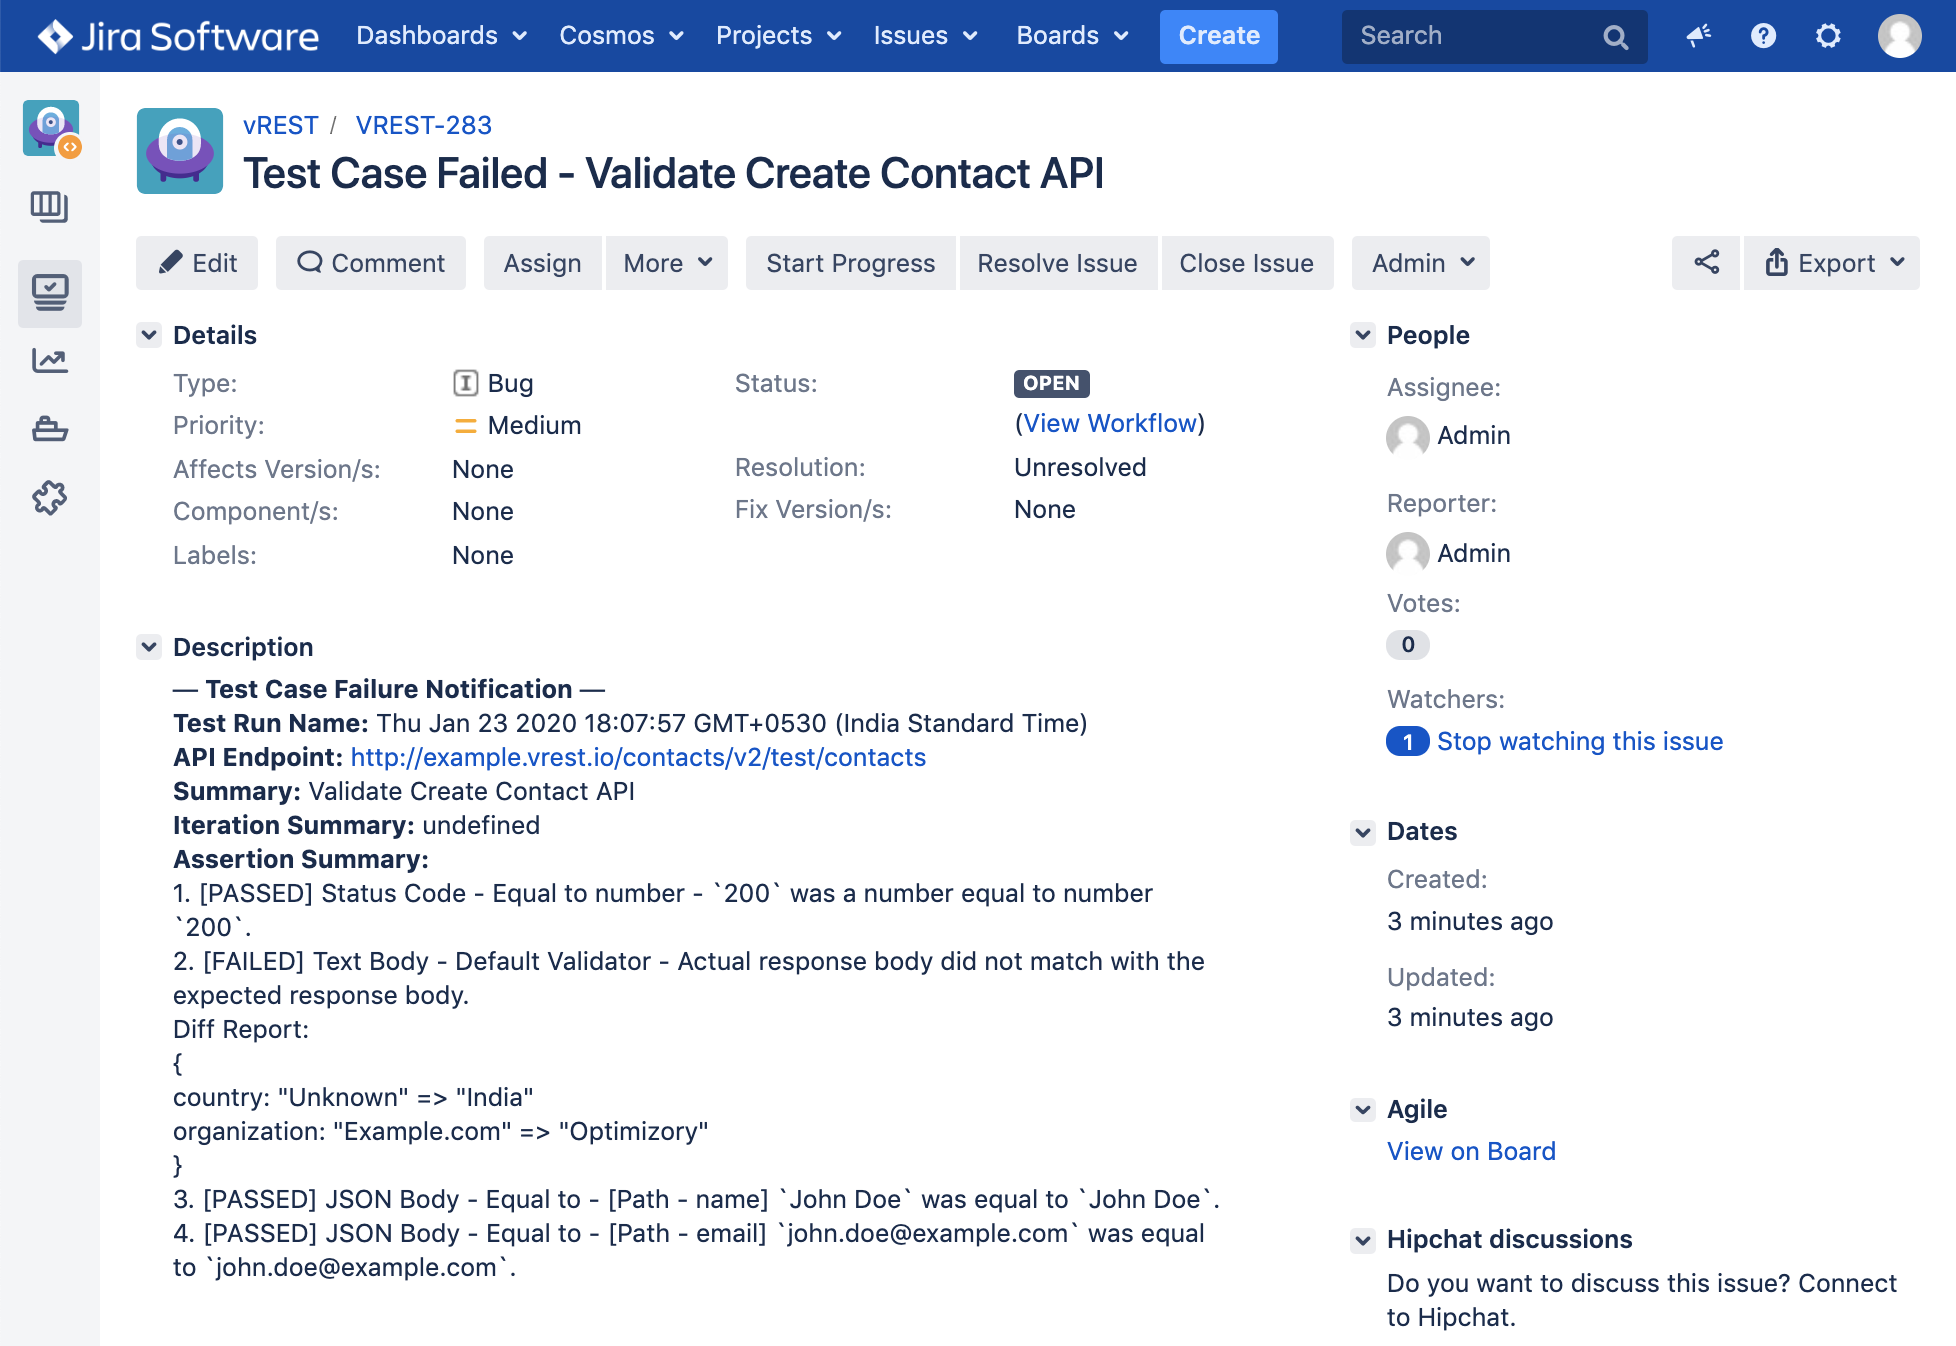
As we can see that it has successfully created a JIRA issue on test failure in the JIRA Application:
So, in this way, you may automate such manual tasks using easy to use hooks functionality provided by vREST NG.